
Materials:
- Full sheet of felt and fabric for the backing
- Matching ribbon, approx 14" long
- Sewing Machine (recommended)
- Felt cut into 6 large squares, 4 small squares, 2 large circles, 5 small circles, 7 large triangles, 2 small triangles
- 4 pattern cards
How to make the rolling felt board:
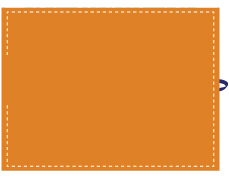
- Place the fabric, good side facing up, then fold the ribbon in half and pin on top of the fabric, with the folded part sticking off the edge by about a quarter of an inch.

- Place the felt on top of the fabric and ribbon, and stitch around the rectangle, leaving a small space to turn it right-side-out.
- Turn the piece right-side-out and stitch up the open hole.

- Press the piece with an iron on the FABRIC side (not the felt side).

Activity:
Use the felt board to practice colors and shapes; the pattern cards give examples of a boat, castle, truck and train that you can create with the shapes. Encourage your child to create his/her own pictures with the shapes. The pattern cards came from mamasmiles.com


No comments:
Post a Comment